|
|
 |
Paint Scratch Repair Tutorial
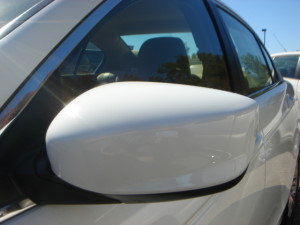
Side View Mirror
|
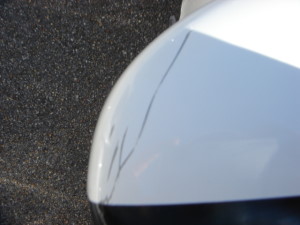
Here we have a side view mirror that has several deep scratches across the top of it.
The following tutorial will take you through a typical repair of the damaged area using some basic paint repair techniques. |
First order of business before doing any repair. The surface to be repaired must be cleaned properly.
Clean the area to be repaired with a non-silicone based solvent, such as 3m general purpose adhesive
cleaner along with a lint free cloth.(blue shop towels work best).
Any area not to be painted must be taped off first. In this case, we start off by taping over the outer
trim surrounding the mirror. Be careful when masking off any area so that the tape doesn't cross over
onto the area you will be painting, such as the spot where the trim meets the mirror, the tape will want
to cross this little groove. It is a good idea to double tape this area since it is so close to the to
the repair. This step will help eliminate the chance of putting sand scratches in the trim piece. The
repair is now ready to be sanded. The remaining areas that need to be tapped off will be done at a later
stage of the repair. |
|
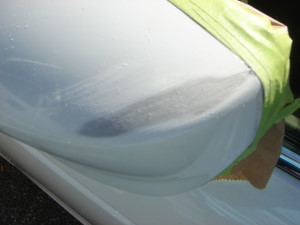
The surface is then sanded with a wet/dry sandpaper. In this case 180 grit sandpaper is first used to
sand out the damaged area until smooth. After sanding with 180 grit, repeat this step using 400 grit
sandpaper. A spray bottle with water can be used which helps to keep the sandpaper from getting clogged up.
A sanding block may also be used to avoid an uneven surface while sanding. Keep from pressing down super
hard when sanding, let the sandpaper do the work. You are done when the surface feels even and smooth with
no hard edges. Wipe the area dry. |
|
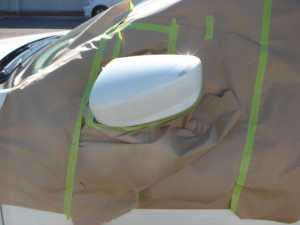
At this point, fold in the mirror and then mask off surrounding areas with tape/paper. Make sure you tape
far enough away from the repair to avoid any overspray. |
|
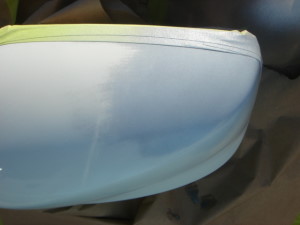
Prime the area with a fast drying aerosol primer. Apply two to three light coats, let dry, then sand
with 400 grit using a spray bottle with water to aid in sanding. Dry off with blue shop towel. Run your
finger across the area it should feel very smooth with no divots or hard edges. IF IN DOUBT repeat this
process until you achieve the desired result. Then wipe the area dry. A scuffing gel (Sherwin Williams
USP 90 works great) is then rubbed over the entire mirror concentrating on the areas that were not sanded.
This will give the surface some tooth for the paint to stick to. Finally wipe the entire surface with the 3M
general purpose adhesive cleaner. |
|
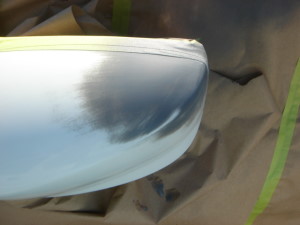
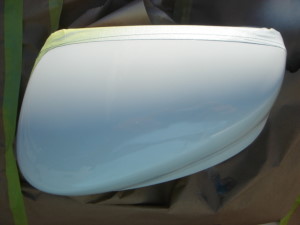
Test your spray gun before you apply paint to your repair. Mix basecoat 1:1 (1 part basecoat to 1 part basecoat reducer)
Apply one light coat of paint first,let dry, examine the repair to see if any sand scratches are visible. Also look to
see if any of the paint is lifting. If no defects are present, continue to apply paint in single coat applications,
letting dry for a few minutes between coats. There is enough paint on the repair when no visible signs of primer are
showing. The area will look dry and grainy at this point. |
|
Test your spray gun before you apply the clearcoat. Mix clear according to label for the product you are using.
When spraying clear, remember to keep the flow even and steady, using a 50% overlap,
meaning spray from left to right, then come back from right to left overlapping previous coat only by half or 50%.
This should be one fluid motion until the entire area is covered. If the area looks somewhat dry, your arm movement
was too fast,wait a few minutes and repeat, using a slower spray pattern, but not too slow or you may cause a
sag/run to develop. |
Remove all tape/paper and discard. Inspect surrounding areas for overspray which may be removed with acetone.
~CarFixin~ |
 |
|
|
| |
Disclaimer: *All information on this site is provided "as is" without any warranty of any kind,
either expressed or implied, including
but not limited to fitness for a particular use.
Any user assumes the entire risk as to the accuracy and use of this information.
Copyright © 2008 CarFixin.com
- Today is Sunday, March 22, 2026 |